Thursday, September 1, 2011

Assignment 2: Personal Website


My personal website is basically inspired from my personal blog that I've created years ago. I really love the design and decided to use it again as my personal website for Assignment 2. I've tried to do the basic design again using Photoshop CS5. Unfortunately when I'm trying to apply the same design in Dreamweaver, there's some changes that I have to make.  Below is the final result of my website.


Designing the layout on Photoshop CS5


Home view of the completed version

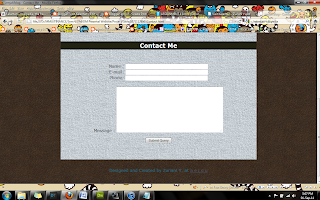
The body of the website

Footer

Some of the pages

Some of the pages.

Wednesday, July 20, 2011

Assignment 1: Completed

With Advanced Layering


Submitted e-Wallpaper


Lab 5: Advanced Layering


1. Highlight or select the image and go to Filter > Vanishing Point


2. Joint all the edges together and adjust until the grid become blue. 


3. Copy the e-wallpaper and open Filter > Vanishing Point.


4. Press Cntrl-V to paste the image.


.

5. Press Ctrl-T to resize and adjust the image.


6. I would like to add the "A TM University" logo on the wallpaper. By using Magin Wand Tool, the image is selected and then press Cntrl-A and copy the image.


7. An then paste the image on the new e-wallpaper.


8. Almost done.


Thursday, July 14, 2011

Lab 4: Enhancing Digital Photographs.


1. Adjusting Shadow/Highlights.


2. Reducing Noise.


3. Adjusting Median.


4. Sharpen. 


5. Adjusting Vibrancy. 


BEFORE

 
AFTER


Saturday, July 2, 2011

Lab 2: Layering & Lab 3: Retouching Skill


In this post I will explain step by step on how I did my layering and photo retouching.  


Created the date for this event by using the "Horizontal Type Tools"


Then, I transferred every layer of all the images that I want to use for the e-wallpaper onto the background that I have already selected earlier.


The images is arranged neatly.  I created a specific name for every layer to make it easier.


For 'Paperman', I'm using 'Multiply' as its blend mode, "Drop Shadow" and "Bevel and Emboss" for style.


The brightness and contrast were adjusted for a better look.


Selected the multiply mode for "MMU OPEN DAY" and for the Styles, I'm using  "Outer Glow" and "Bevel and Emboss".


For "Date", I'm using "Multiply", "Drop Shadow" and "Outer Glow"


For "Mascot" I'm using "Multiply", and "Bevel and Emboss"


For "MMU" logo, I'm using "Multiply", "Drop Shadow" and "Outer Glow". 


At the end of the process, I just realized that the year for the event is wrong, so I had to edit the year.


The completed version. 


My MMU FOM OPEN DAY e-WALLPAPER


Wording


I know it would be rather complicated to create my own typography, so I decided to search one on Google. 


I'm planning to use the alphabets above and put it into a sentence, which is  "MMU FOM OPEN DAY". By using magic wand and selection tools, I carefully picked the alphabets needed one by one, and arranged it into a complete sentence. 


And this is the completed one!